
I’ve gotten over my mental block on doing scenery, mostly as the result of doing a couple of dioramas in support of my clinics (BTW this is an excellent way of trying out new techniques and, if you don’t like the result, you can just chuck it away). In addition, I’ve had the opportunity to hone my skills by working on other people’s layouts (and act all altruistic in the process!).
However, I’ve had exposure to two scenery virtuosos which have made me feel totally inadequate. But first let me expand on my thoughts about scenery. My first exposures to scenery, in my pre-high school days, were parakeet gravel for ballast and dyed sawdust for everything else (yes, and painted plywood – see below). The most commonly available commercial products of the day were the Like-Like grass, earth, coal and ballast in the familiar boxes; which to this day are essentially unchanged after 50 years. And maybe you know the joke that circulates in the O scale community – “What’s an unsceniced layout? Bare plywood. What’s a sceniced layout? The plywood’s painted green.”
Today there’s a bewildering array of excellent scenery products, that can be intimidating in itself. I particularly favor the various ground cover blends as far superior to the mono-colored, uniform textured products. Following the directions on any of the excellent scenery products that we have today will get you passable scenery; often in a single step.
You can get good scenery by copycatting what you see in the real world. I remember reading somewhere (maybe one of Armstrong’s books?) that the allure of southwestern (US) railroading was the scenery, it’s easy to duplicate – few trees and sparse vegetation. I don’t know. If you study photos of Pelle Soeburg’s or Eric Brooman’s southwestern themed layouts, you’ll see that there’s a lot more to it than that. Here in the eastern US, look at any field in nature. Unless it’s a manicured lawn or a planted field, the color and texture of the field will vary from place to place across it. Bare ground will show through in spots; there will be scrub and weeds in others; dried grass will appear brown even at the height of summer; colorful wildflowers may dot it here and there.
This is the stage of scenery design that I’m at. To duplicate this effect, I use a layered approach. Starting with a tinted or painted scenery base (not on the bare, pool-table-flat plywood; whether it’s painted green or not!) I lay it on in irregular thicknesses, intentionally building in mounds and undulations, because fields are not perfectly flat. On top of this I apply something that simulates the texture and color of the earth. Any one of the commercial “earth” products will work (in fact you should use a few in different spots for variation) and, believe it or not, good old Life-Like earth works well in this application. On top of that I use at least two of the blended ground covers – one finer and one more coarse – to simulate the look of an unkempt field. And I don’t use the same two blends everywhere. As the next layer I’ll sprinkle “burnt” grass, yellow straw or other lighter contrasting colors in irregular patches. The final layer is larger ground foam, polly balls, or other products that add the stand-alone bushes. None of these color layers is applied as a solid opaque layer. It’s applied thinly enough that a hint of the “earth” layer comes through.
This procedure produces “journeyman” level scenery; superb scenery requires some artistic talent. This brings me back to the two scenery masters that I am acquainted with. Each of these model railroaders has a different scenery style. Each produces breathtaking scenery. And each uses predominantly common and/or natural materials in addition to model railroading specific products.
Chris Smith is a member of our local O scale group and an N&W modeler. Chris’ layout is in a modest sized basement (by O scale standards). As a result, the track is pushed out right to the walls in an effort to get in the largest radius and the longest run. There is little room for scenery between the track and the unyielding basement walls. But Chris has mastered the situation; of course he has an advantage, he’s a professional artist!
Sometimes in as little as 3-4” between track and wall Chris has reproduced eastern mountains in a manner that your brain sees a large mountain. Not just mountain forms covered with puff-ball “trees”; Chris has provided every clue that you would see in reality – bare patches, slide areas, trees clinging to and growing out of cracks in rocks. The density of his vegetation is far less than the typical “puff ball” mountain; yet your brain perceives a real, densely wooded eastern hill. On a scale between “impressionistic” and “photo realistic”, Chris’ work is a tick or two on the impressionistic side. I don’t have nearly enough pictures of Chris’ layout, but take a look at what I do have and judge for yourself (Clicking on any photo will blow it up. Use your back button to return).


In his work Chris has used dirt from his backyard and ground up leaves for, what else, leaf litter. Scenic Express tree armatures, ground foam and cast plaster rocks round out his palette of materials. Chris did an article on his mountains: "Vertical Scenery", O Scale Trains, Mar/Apr 2014, if you can find a copy somewhere you can read about his technique.
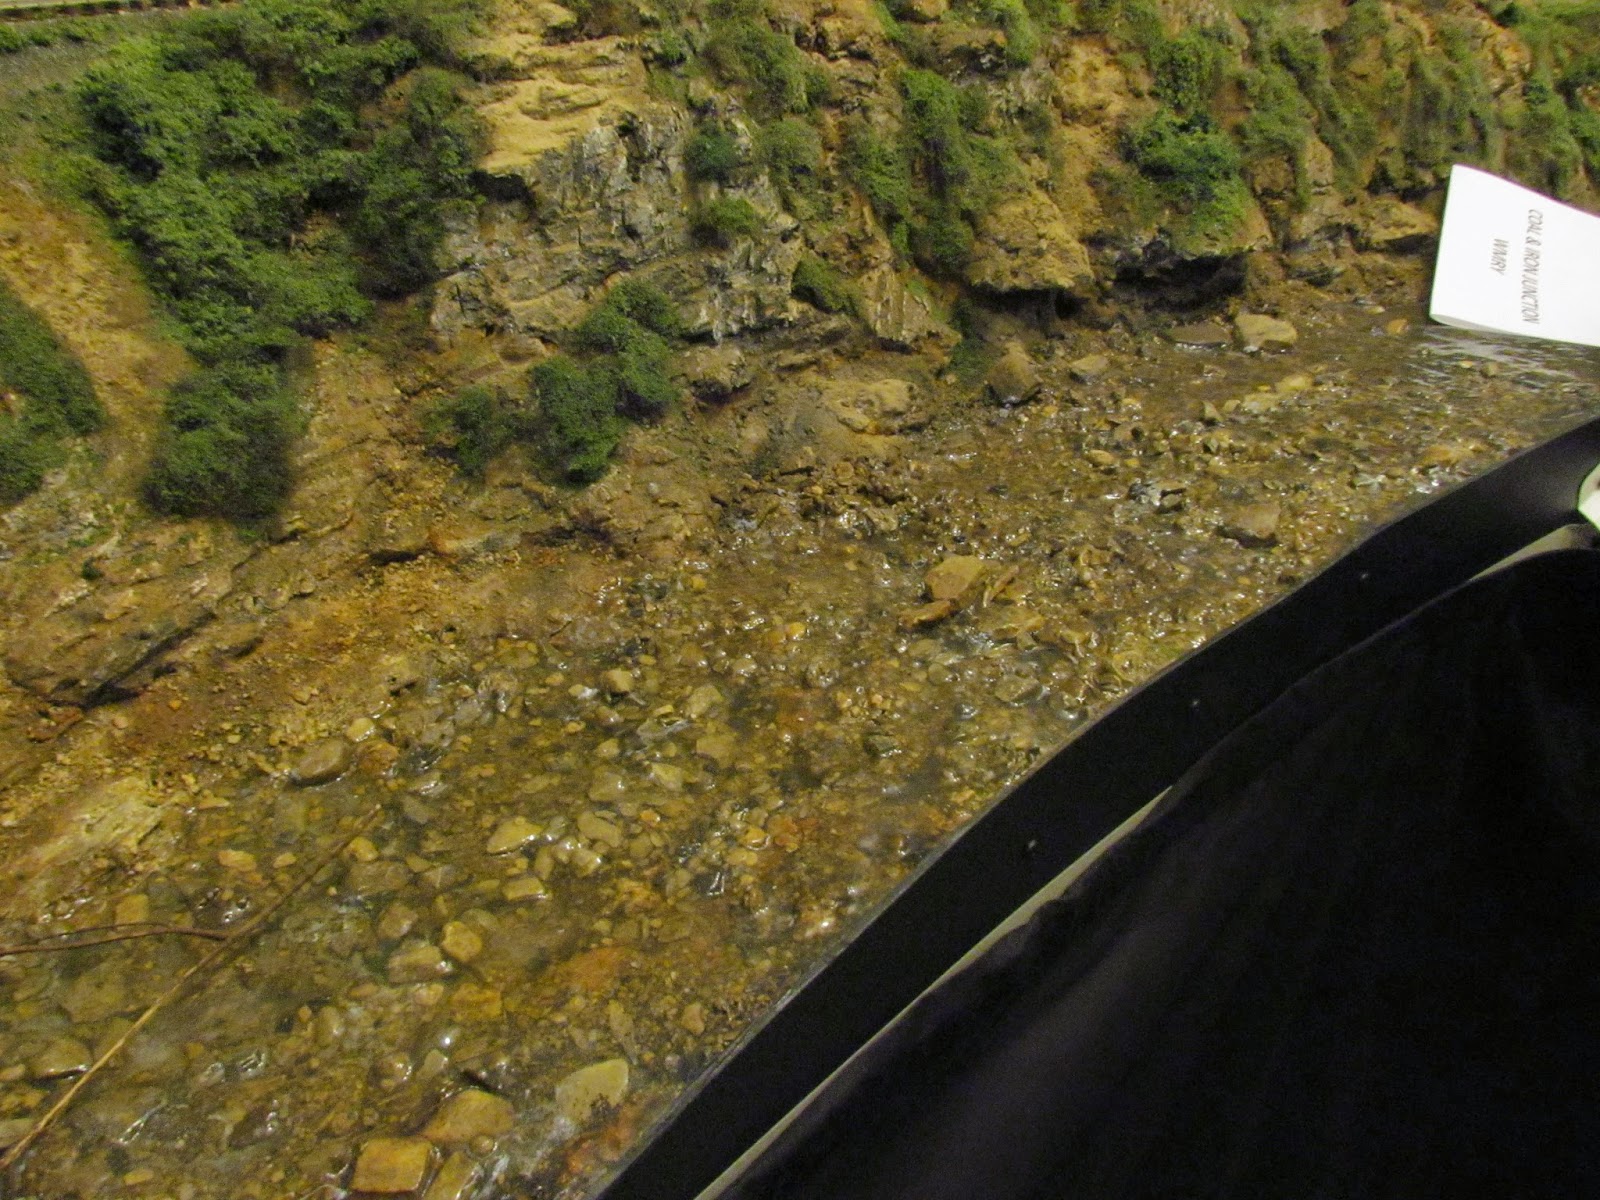
One of the first scenic features that Chris finished (and one that I am jealous of and really makes me feel inadequate) is his river crossing scene. The river, the rocks, the shoreline, the grass, the bridge –everything is in proportion, balanced and PERFECT! And what did he make his water with? Plain old Minwax varnish, poured on and built up in layers. The natural amber color of the varnish adds to the effect of a lazy, somewhat algae-choked stream.


A couple of years ago at my second layout open house, Jay Beckham and Warren Hart visited. Jay is building an O scale layout in Berkley Springs, WV. Warren had, at that time, just recently returned to model railroading after a very long hiatus. Before he left my layout, Warren shared with me some photos from his long gone HO Western Maryland layout and, even though they were low-res web photos, they were impressive. See for yourself.


A few weeks ago, Jay opened his layout for the MER NMRA convention and I made the trip to West Virginia to take a look. I was blown away. Warren’s scenery was incomparable, especially when paired with somewhat subdued lighting (a technique that I’ve seen used very effectively recently).
The photos do not do the scenery justice inasmuch as the camera tries to compensate for the low level lighting. The scenery is more impressive in person.


Since this was my first trip to see Warren’s work “in the flesh”, I could not ply him with enough questions to glean any significant insight into his scenery techniques. Some highlights – his rocks are hand carved (although I prefer castings); water is made with successive pours of gloss Mod Podge; coloring is done with craft store acrylics and some of the hanging vegetation is poly fiber teased out and covered with ground foam. On the scale between “impressionistic” and “photo realistic”, Warren’s work is either dead center or a tick towards photo realism.
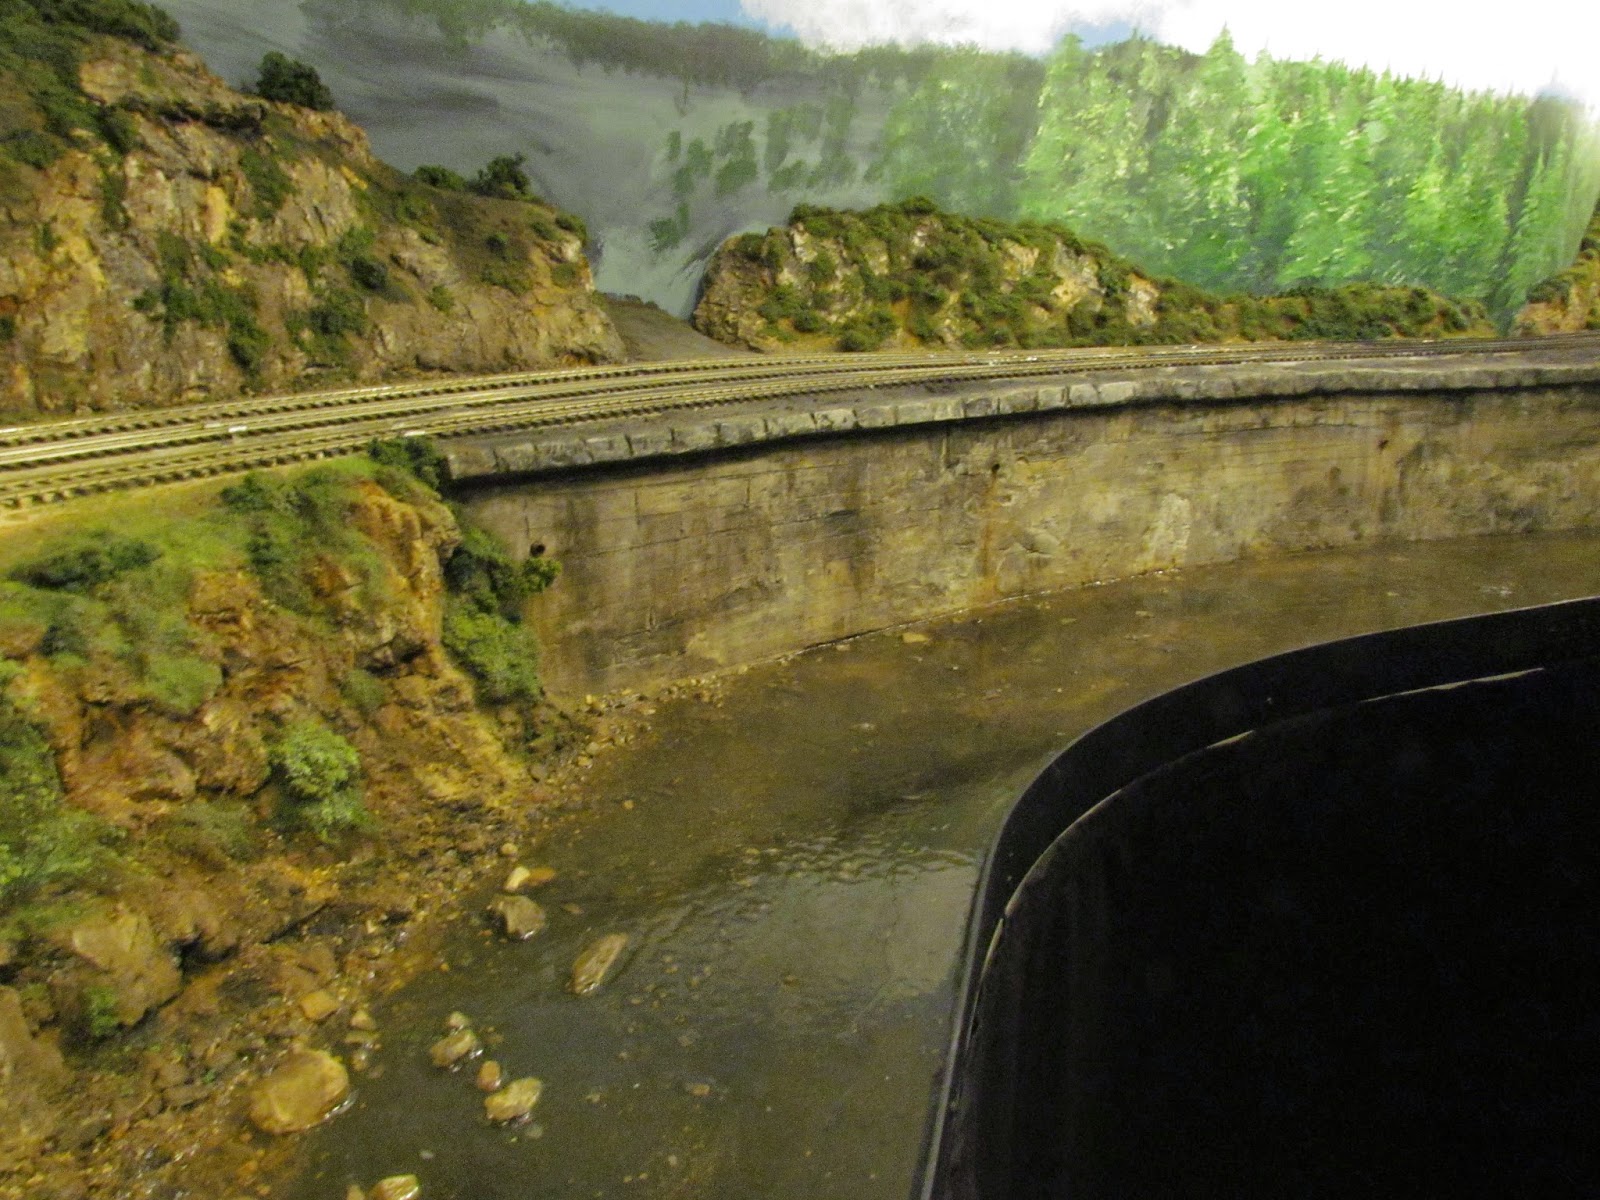
The most impressive scenic feature so far (and the layout is not nearly finished scenically) is this concrete retaining wall. These walls are common along the WM, which hugs the Potomac River and its tributaries along its climb into the mountains. Although Warren explained how he did it, I still find it mind boggling.

If I can arrange for my schedule and Warren’s to line up, I’d like to understudy him at a future working session.
When I planned my own layout, I took John Armstrong’s advice and planned for more lighting rather than less. My 5000 K overhead fluorescents reproduce high noon on a bright day. But there’s something to be said for planned subdued lighting. Maybe this is something in my future?


