Some of these photos were a series of overlapping shots intended to be stitched together using photo stitch software. When I did that for the Cheat River shots, it was clear that the view southward, the way it should look for my model railroad, was scenically uninteresting for use as a backdrop. The view northward, however, was really great. So with some reluctance to abandon authenticity, I decided to work with the northward-looking view.
Upon studying what was now a Cheat River photo mural, I saw that the terrain rose to the right in the photo and fell off to the left. This was exactly the opposite of what was needed to fit the intended scenery of my layout. On thinking about this now, it's not surprising that the view in the opposite direction would be flipped left-to-right.
The solution was obvious, flip the mural in Photoshop. While I was in Photoshop, I also eliminated a couple of distracting parts of the picture (mostly roads) until I was satisfied. Is a photo mural of the Cheat River looking the wrong way, flipped left-to-right and with elements edited out still a representation of the Cheat River? I don't know, but I'm happy with the results.
But I was not done yet. Three, 6-megapixel photos stitched together doses not a backdrop make. I had to expand a picture that would have printed out, at best, 11" x 24" into a wall-sized print. To accomplish this task I used Gimp, a open source (freeware) photo editor almost as powerful as Photoshop. This was a multi-step process that will be the subject of a future post; but suffice it to say that it required many hours on a dual-core laptop and, eventually, a used Dell workstation purchased off of E-bay to generate a 33" x 72", 300 dpi, 70 Mb file.
Printing this enormous file was another problem. I had access to a HP DesignJet 4000 large format printer. After literally dozens of attempts that either did not print out, or printed out at the original 11" x 24" size, I finally got the 33" x 72" print I was looking for; to this day I don't know how I did it.
I mounted the print to 1" blue foam board, put it behind the still-unfinished bridge over the unfinished Cheat River on the layout, stood back and shrugged my shoulders. Surrounded by all of the unfinished plywood and no other scenery it didn't look like much.
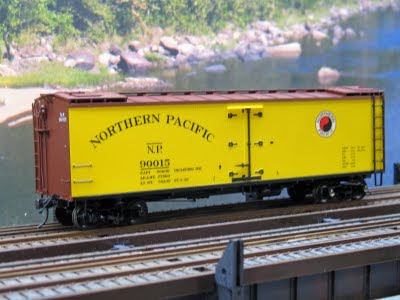
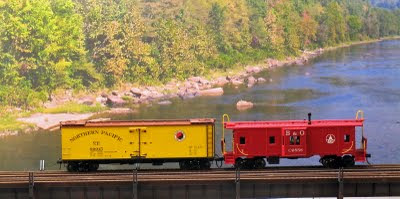
And that's the way it stayed for a few months; until one day I was down in the basement with my camera and, on a whim, put a colorful reefer on the bridge and snapped a photograph. By chance the shot was more or less looking down the river in the backdrop and not flat-on to the bridge and, although the shot was not perfect, the sight of it on the camera's screen made me say WOW! Here is that first photo:


The limited depth of field and fuzziness of these hand-held, available light shots prompted me to buy a tripod so I could use the aperture priority feature of my camera (Canon A620) and use a slow ISO setting as well. That would let me take sharper photos.
Here is an example of a sharper, tripod-mounted shot with a bounce card used to reflect some light on to the undercarriage of the loco (compare to the undercarriage of the rolling stock in the photos above).

This loco is now awaiting its turn in the paint shop to emerge repainted and re detailed as a proper B&O locomotive.
So by sheer serendipity I have managed to create a great photo location on the railroad. Now if I can just manage to put the trusses on the bridge and finish the riverbed, it should really look good.


No comments:
Post a Comment